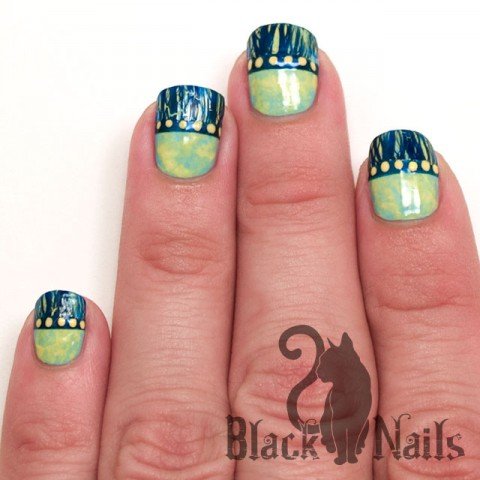
I’m really in love with this nail look, I can’t take it off yet!
During my last haul I picked up two New York Color Crack Me Up Crackling Effect Top Coats, because they were only $0.99 each! This royal blue one is just great, it gives me so many ideas for new designs.
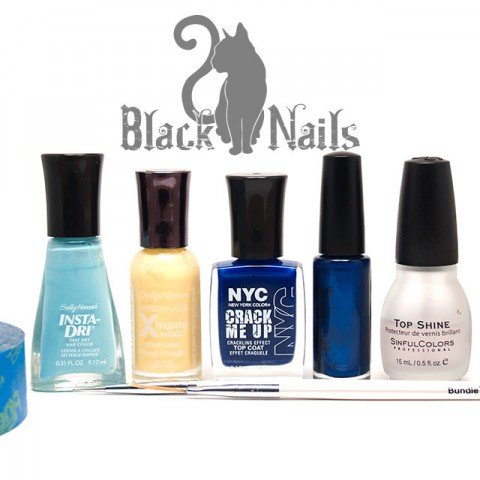
Get The Look
- Sally Hansen – Mellow Yellow (xtreme wear)
- Sally Hansen – Blue-Away (insta-dri)
- New York Color – Broadway Smash (crack me up)
- FingerPaints – Royal Renoir (striper)
- Plastic bag, sandwich bag, saran wrap, etc.
- Painter’s tape, scotch tape or stripping tape
- Bundle Monster – Tiny Dotting Tool
Quick Steps
- Gather Your Supplies – gather all of the above, plus your clean up tools:
- Basecoat and topcoat
- Petroleum Jelly
- Small soft brush
- Cuticle stick
- Acetone or DIY Glycerine-Acetone
- Clean up brush or Q-tips
- Protect Skin – For easy clean-up dip a small soft brush in petroleum jelly and lightly coat all around your nail bed right up to the edge, including your cuticle. This will make clean up a snap after this messy technique, most of the paint will easily wipe away with just a cuticle stick.
- Base Color Coat – Apply 2-3 coats of a base nail polish color (you can use just 1-2 coats, but if you want the manicure to really last 3 thin, even coats works best from my experience). Here I used Sally Hansen Blue-Away.
- Bag It – Bunch up a plastic bag until you have a quarter size of folds. Dabble drops of blue and yellow on the folds, here I used more Sally Hansen Mellow Yellow than blue since the base was already blue.
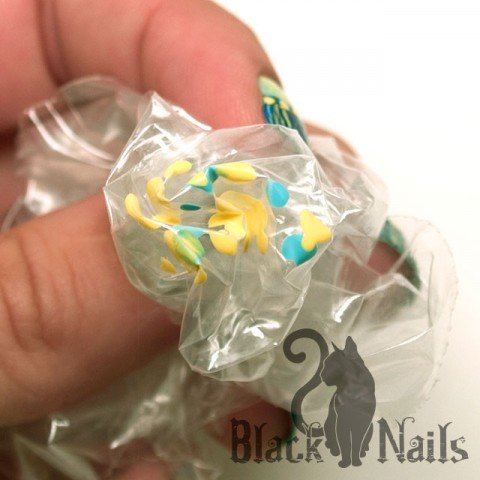
- Dabble – Dabble the now painted plastic bag over your nail spreading the drips you created out over the nail bed. As you do this the colors will blend together creating a neat marble effect. This works best if you dabble quickly and don’t go over the nail too much on one coat or you will start to lift up the paint. I repeated this step twice on each nail. Repeat steps 4 & 5 for each nail.
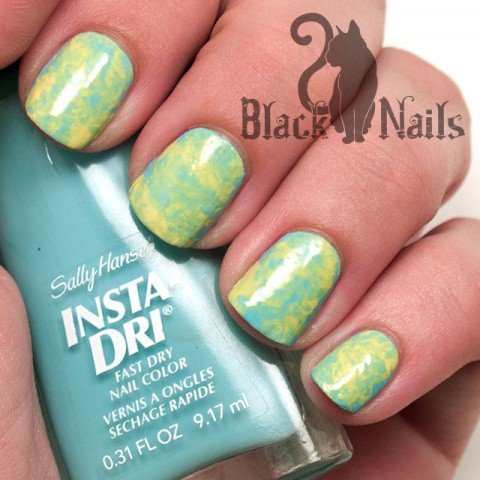
- Blending Topcoat – To make the colors blend together even better, immediately follow up your second layer of dabbles with a topcoat. This will also give you a smooth surface to work with for the next step.
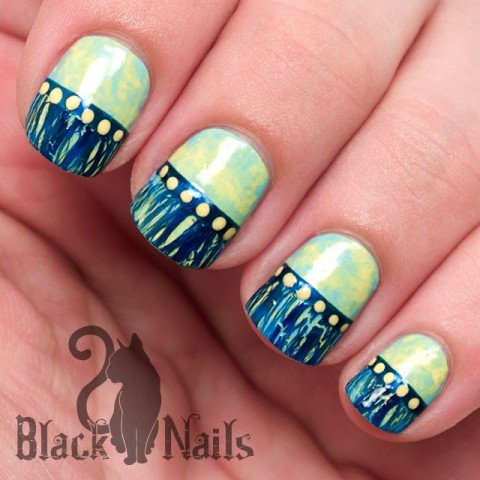
- Stripe Frame – Frame out your tip by using a piece of tape to create a straight guide horizontally across the middle of your nail. Paint a a dark blue stripe using the tape to create a perfect bottom border. If you don’t have a striper you can use a striping brush to turn any nail polish into a striper!
- Crackle Effect – Brush the blue crackle polish from the stripe you just drew to the tip of each nail. Wonder at the awesome effect!
- Tiny Yellow Dots – Using a tiny dotting tool create a line of yellow dots down the center of the blue stripe.
- Clean Up – Use a cuticle stick to first wipe up paint on your skin, and most of it will wipe right off because of the petroleum jelly base. Next, use a stiffer, angled brush dipped in acetone to clean up your cuticle line to perfection. Allow the design to dry for half an hour before applying your topcoat if possible, to minimize the chance of smearing. Moisturize and, voila! Your done.
Here are a couple close ups of how this turned out. Hope you like it!

SO UNIQUE!!! Love this!
Thank you!
Love this design!!!! I am going to try it!
Yay! I would love to see it if you post on Instagram tag me. Or email me. I actually want to break out my crackle polishes again too.